Thursday, November 15, 2012

Basic Code (Flashcard) Sliders

In September I began working with a first grader who, just a year ago had a life-threatening condition which required her to have half of her brain removed...Causing her to relearn basic information she previously knew before the surgery. With deficits in receptive and expressive language, I wasn't quite sure how I was going to help her to learn to read...Each day with her was trial and error!

A few weeks ago when I was working with her in reading intervention she began blending the sounds that another child was saying. {I was amazed to say the least!} I looked at her and without hesitation she replied, "I can do that, duh!"


A couple students where using the "See, Slide, & Say" Flashcards (purchased from Barnes & Noble) that have picture cues below each letter to help them when they are trying to say the sounds in words. There is a "slider" that they can pull to look at the letters one at a time. I showed Kelley a card to see if she could look at the letters to tell me a sound...Although she tried to use the pictures as a cue, some of them were difficult for her to recall. I thought maybe if the pictures were different, she'd be able to use them to sound out words.

Her aide worked with her for about a week, generating a picture for each letter sound. I took those pictures and created her own "See, Slide, & Say" flashcards using basic code words from our district's high frequency word list. These cards have been a big hit with Kelley and my lower first grade intervention students, so I thought I'd share them with you! Click on the link under the picture to download!
Download Basic Code Flashcards (FREEBIE)
Have a great weekend, bloggers!

Sunday, November 11, 2012

Random Freebies

When I taught vocabulary in the classroom setting, I had a plethora of posters that I'd use to teach synonyms, antonyms, homophones, contractions, and compound words. To see these posters, head on over to ReadingResource


This year is a bit different...I find myself having to tweak things that I used in the past to fit my multiple groups. This week I will continue talking about homophones with my first graders. I love reading "Eight Ate: A Feast of Homonym Riddles" and having kids come up with their own..."A Pair of Pears" is a great template to use to help students create their own riddle.
Download Freebie!
Another activity I will be doing with my intervention kids (the day before Thanksgiving Break) was taken from Pinterest. Launi from Gracious Rain made these "Sweet Acorns".


I am going to send home a note with my intervention students this week asking for any donations. I've attached my letter, as well as one that you can use in your classroom by filling in the missing info. 
Download Letter to Parents
To take it a step further, students will be creating a "Super Tasty Treats" Recipe Book where they will be writing in the ingredients, writing the steps, and illustrating their creations. At the end of the school year, they will have some recipes they can share at home with their families.

Download Recipe Book
I'll take some pics and let you know how it goes...Have a great week bloggers!

Saturday, November 10, 2012

This Week in Intervention

A few people have asked me to post a sample of my lesson plans for reading intervention this year...My groups have continued to change and I am finally working with just two grade-levels (instead of five)! I'm trying something a little bit different and trying to document each student (everyday) so that I can share these insights with the classroom teachers. I've revised these plans a couple times, but I think I've got it the way I want it! 
Download This Lesson Plan
Each reading intervention group has a color designated to it. At this time in the year, we are working on "Phonemic Awareness, Basic Code, and Advanced Code". I also have a place for "Other" which allows me to document any attention and/or behavior problems. If you have any ways to document intervention groups...Please send them my way!

Sunday, October 28, 2012

Someone with a beard told me not apologize for not writing a single post in the past two months...so I'm not going to. But I will tell you, I've been knee-deep in running RTI & pulling reading intervention groups...250 kids a day to be exact! Yes, I feel like a first-year teacher all over again, only I'm in bed every night by 8:30. Not joking.

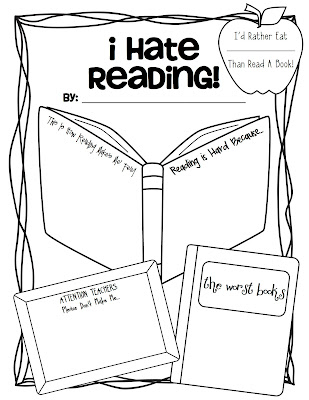
One of my biggest challenges was working with a group of third and fourth grader boys who struggle with just about every aspect of reading. By this point they have given up on learning to read...I knew my approach needed to be different than their last three years of school. I was given the book, "I Hate to Read," by Rita Marshall from another co-worker and created a "time capsule" sheet to accompany the book. We spent a week of reading intervention reading books that we hate...I was able to get some very honest opinions out of these kiddos and have based my group time working on their reading "frustrations". 
"I Hate Reading" Download

We wadded up these pieces of paper and threw them in a box that we will open at the end of the year. (We wrapped this box in foil and the boys turned it in to a robot). 


I promise I will continue to add more freebies from my intervention room (and post more!) now that I finally feel like things have settled. Here is a copy of one of the graphs I've used for reading homework with my second graders. It's something I created last minute, nothing fancy.
Fluency Progress Chart Download
If you haven't already done them...Happy Report Carding and Parent Conferencing...See you soon.

Saturday, August 4, 2012

(More) Guided Reading Organization

A few people have e-mailed me about the binders that I use for my guided reading groups...I've always found it easiest to label my reading groups by color. The old versions of my binders that I have on my website look something like this...Eeekkk!


Last year I purchased binders from Staples (and because they are packed somewhere in the stacks of boxes in my room, I can't take a pic for you at this time)...
I created a blank cover sheet for each colored reading group in which I printed on white card stock and laminated. In the square that's on the bottom right-hand corner I place a Post-It with the names of the students in that group. When the groups change, I can take the Post-It off and easily replace it with the new names! You can print off this template by clicking on the link below.
Guided Reading Binder Covers 
So, inside the binders I keep record of what I do with each group. I rarely ever make lesson plans the day before...unless I am gathering materials that I know I will need. I am able to look at the notes I took the day before and begin from there. I created a generic template that I still find helpful today...


You can take a peek and download it or if you look at my Guided Reading Page on ReadingResource you may find some others you'd prefer to use. I know there's a lot of different lesson plans out there, if you have any others, I'd love to hear about them!

Wednesday, August 1, 2012

Organization Linky Party

Typically I'm uninterested in link parties, but when I saw it was an "organizational" party from my dear pal Amanda, I couldn't resist!
You should probably head over and check out Amanda if you haven't already!
I went into school today and was bummed to see that my new room STILL hasn't been cleaned. Translation: I'm going to have to throw some old classroom pics your way! You may recognize them from my pages over at ReadingResource and older posts on this blog...I promise I'll get new pictures up this year when my room is ready. But for now, here are my favorite things to organize.

My colleagues like to joke about my undying love for my guided reading table (and all the shelves that surround it) saying it's my first born child. Well, it's true!

This was my table a couple years ago...


I believe that a well-organized small-group area that has all materials where they're needed allows for effective instruction. I keep my leveled books in the purple, blue, and green bins on the black shelf. The pic below shows a closer look at them. A few years back, I revamped the labels...You can print them off my clicking on the links below. (Use with Avery 8163 labels).


Guided Reading Labels #1 and Guided Reading Labels #2
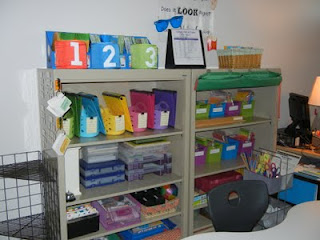
This was my table last year...Well, a closer look at the shelves behind it I should say. I was fortunate to have two large shelves behind where I sit. 


Last year I had five different color-coded reading groups. Each group was designated a specific color (green, teal, yellow, pink, and purple). On the left side of the shelf, you can see the colored bins, as well as color-coded binders. In the bins I kept all of the materials for that specific group and in the binders I wrote down my lessons for each group. 


I printed the following template on card stock, laminated them, clipped them on the front of the basket, and wrote each group members' name with a dry-erase marker. That way when I change groups (which I do very often) I can easily rewrite the new names without having to make new tags!


In another location of the classroom where the children can easily access the bins, the same colored bins are used for placing books, games, magnetic letters, etc. taught in the small-group setting that those students can later use during literacy centers.


As you probably know, getting your classroom library set up can be one of the most difficult things to organize in your room!  When I first started this process, I "hired" a couple of my former students who knew my books well. We laid out all of the books by authors, illustrators, and topics. (Because teaching my students how to select appropriate text is very important to me, I didn't want to level my books with a number or a letter). I was able to create a plethora of different bins. I invested in some sturdy bins and ended up purchasing more than I needed because I knew my library would continue to grow. 


Once I established the names for each bin, I created a picture to represent that bin. These were mostly found by Googling and using clip art (unfortunately, Scrappin' Doodles wasn't around at that time). I also invested in luggage tags from Container Store. Although they weren't cheap, they are very durable and can withstand my little kiddos. Each book that is in the bin has a corresponding picture on the outside. 


When you are needing to label student cubbies and mailboxes, I recommend using binder clips! I just printed off the names with my label maker and slapped them on the edge of the shelf. This was SO helpful when kids moved in and out throughout the school year...I could easily alphabetize the names and it didn't ruin my shelves!


I'm not sure who the genius was that thought it was a good idea to purchase teacher's desks WITHOUT any drawers! Solution: I purchase yet some more storage bins and sorted my junk into 12 drawers...that I of course labeled with my label maker! 


A few years ago the librarian was getting rid of her magazine boxes and I snatched them up for my own professional library! I have all my books organized by subject, which make it nice when Steve comes to "borrow" my stuff.


Well, that's it for now. I promise I will get some new mugs up here as soon as I get into my new classroom.

Sunday, July 22, 2012

Target Finds!

As I walked past the "School Supplies" section at Target, I realized this is the first year I won't have to stalk up on crayons, notebooks, glue sticks, pencils, and dollar bin plastic organizational containers...Saving money should make me happy, right? 


Well, apparently the "Dorm Life" section is my new favorite location. I found some {exciting} finds I can't wait to use even though I'm not heading back to college. Although my camera-taking abilities are lacking, hopefully you'll see why I'm so excited.


I found some lights that not only can be plugged into a USB port, but they have letters that can be changed throughout the year. I made mine so that it says, "WE LOVE READING". 


I'm always on the look-out for new tools to help teach comprehension. I'm thinking this dry-erase bubble will be perfect when I introduce making connections and mental images! What's even more exciting...it lights up! Kids will love it.


My schools' Core Values (The Five C's) are going to be prominent fixtures in my classroom. I found these super-cheap black picture frames and I'm quite please with how they turned out!


That's all for now...I'd love to hear any back to school finds you've located! :)

Thursday, July 19, 2012

Bead Slides and CVC Word Cards

So I have the stormy weather and a new blog to thank for the arts and crafts mess I've created on my bedroom floor. A few weeks ago I stumbled upon a new blog (that I heart) and eyed a phonemic awareness idea I wish I would have thought of myself! Julie over at Make, Take, & Teach has created a "bead slide" to teach phoneme segmentation. Genius. She even has a video demonstration and a word list...you should probably head over and check it out. 
I found this inexpensive beads and ribbon at Jo Ann's & will be able to have a class set of bead slides! 
A teaching buddy of mine has been working with a kid who has been reversing the first and last letters in words and I got an idea...Hopefully it will also be a tool I can use with my kindergarten students this coming school year and hopefully you will find it useful too!


Using the green, yellow, and red traffic light idea, we've created color-coded CVC words to help early literacy learners decode words using the appropriate left-to-right concepts of print. There are corresponding black-and-white copies that can be printed on the back of the colored words to help them generalize their improved decoding skills to fluent reading without the controlled colored supports.
Free Download at TpT!
Leave us some love if you download the Free "Traffic Light CVC Word" Template at TpT!

Monday, July 9, 2012

READ-O...Updated Version!


Do you remember this READ-O????
Steve and I've had such a huge response...and we heart you so much, we've made a READ-O for the school year! 

READO-O can be used in a variety of ways to keep your students practicing important skills at home during each month of the school year. READ-O is especially useful for helping parents practice important literacy skills with children and offers a fun effective way to keep kids engaged in academic activities...especially during winter, spring, and summer breaks! We've scaffolded the ELA Common Core month by month in a black and white template, easy for printing for each of your students!
  • August/September: Reading Foundation & Reading Literature
  • October: Reading Foundation, Reading Literature, & Language
  • NovemberReading Foundation, Reading Literature, & Language
  • December: Reading Foundation, Language, & Speaking and Listening
  • January: Reading Foundation, Reading Informational Text, & Language
  • February: Reading Foundation, Language, & Writing
  • March: Reading Informational Text, Language, & Writing
  • April: Reading Literature, Language, & Writing
  • May/June: Reading Literature, Language, & Writing
Our TpT Store
Head on over to our TpT Store to download a free sample and purchase our year long READ-O! Please leave us some feedback and let us know what you think! 

Thursday, July 5, 2012

Classroom 117

About a year ago I wrote a post about my new classroom. I was so super-pumped about my new lime-green room! I thought for sure this would be the room I'd settle in for a while, after all, I spent a couple pay checks purchasing furniture to fit my new space...


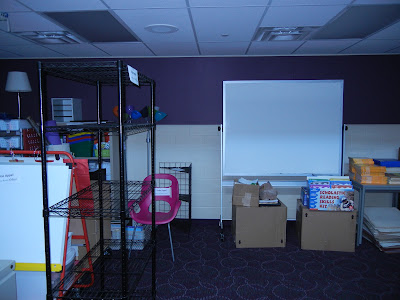
Well, this year I will be moving into a new room...yet again! I'm very excited to be moving into a new reading intervention position, but I find myself struggling to come up with my room design. Secretly, I heart coming up with new room designs. Instead of creating the typical meeting area, Daily Five and math learning stations, and group meeting space...I will be creating four areas for reading intervention. (I'll have 2-3 other teachers and support staff pulling groups at the same time). I feel like a first-year teacher thinking about the layout of my new space!


Today I came across The Make Room, a site (on Pinterest, of course) which allows you to design your own space. All you have to do is add in the dimensions. It's practically the most genius site of all time. Translation: I've spent 75% of my day using it! I don't have my room finished yet, but I'll throw some pics of my new space at you. I'll make updates as I progress...but I'd love to hear any suggestions you have for me!


There's all my stuff! Yikes.
Wishing the blank wall was storage cabinets!
The only storage cabinet...and yes, it's already loaded with my stuff!
More stuff...
...and more of my stuff. 
I've always wanted a bedroom with vaulted ceilings, but I'll settle for a classroom! 
The purple wall folds up and leads to the school's stage...Did I mention it's also magnetic? (Just might be my favorite part of this room!)
More to come!